
Sage Intacct Integration
- Print
- DarkLight
Sage Intacct Integration
- Print
- DarkLight
Article summary
Did you find this summary helpful?
Thank you for your feedback!
Setup in Sage
Turn on Web Services
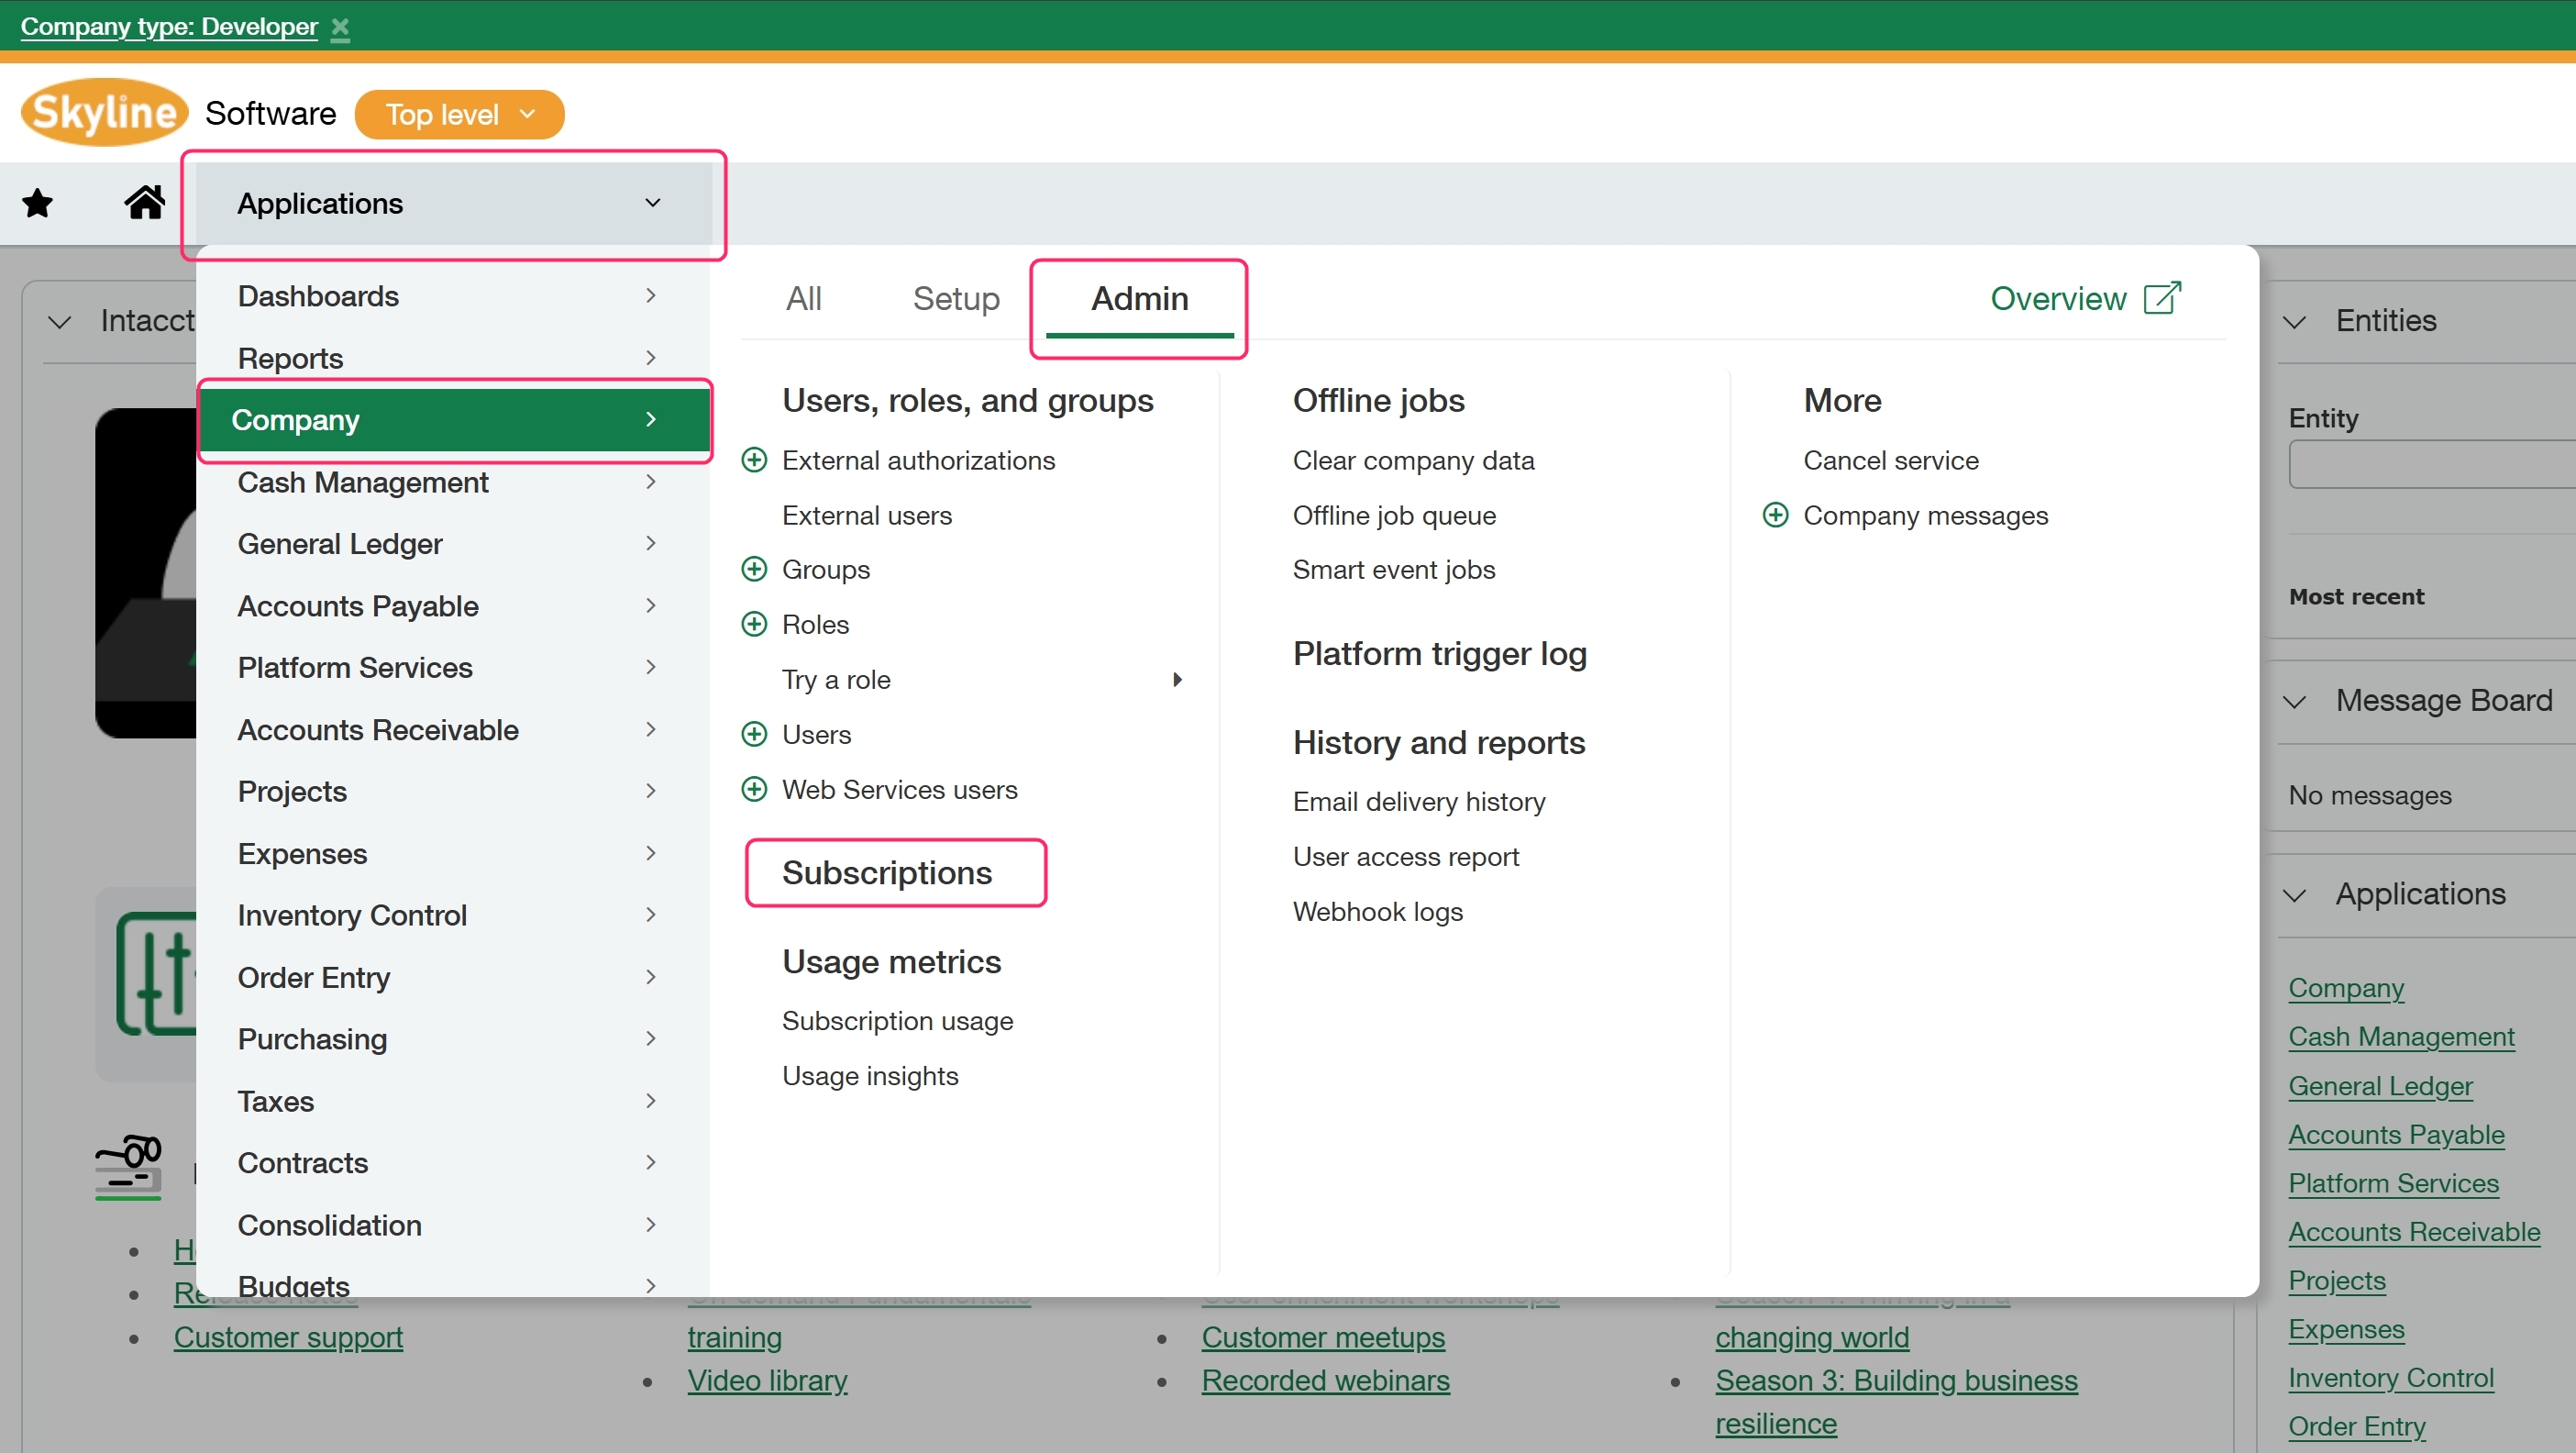
The first step is to confirm that you have the Web Services setting turned on by going to Navigation Menu > Company > Admin > Subscriptions.
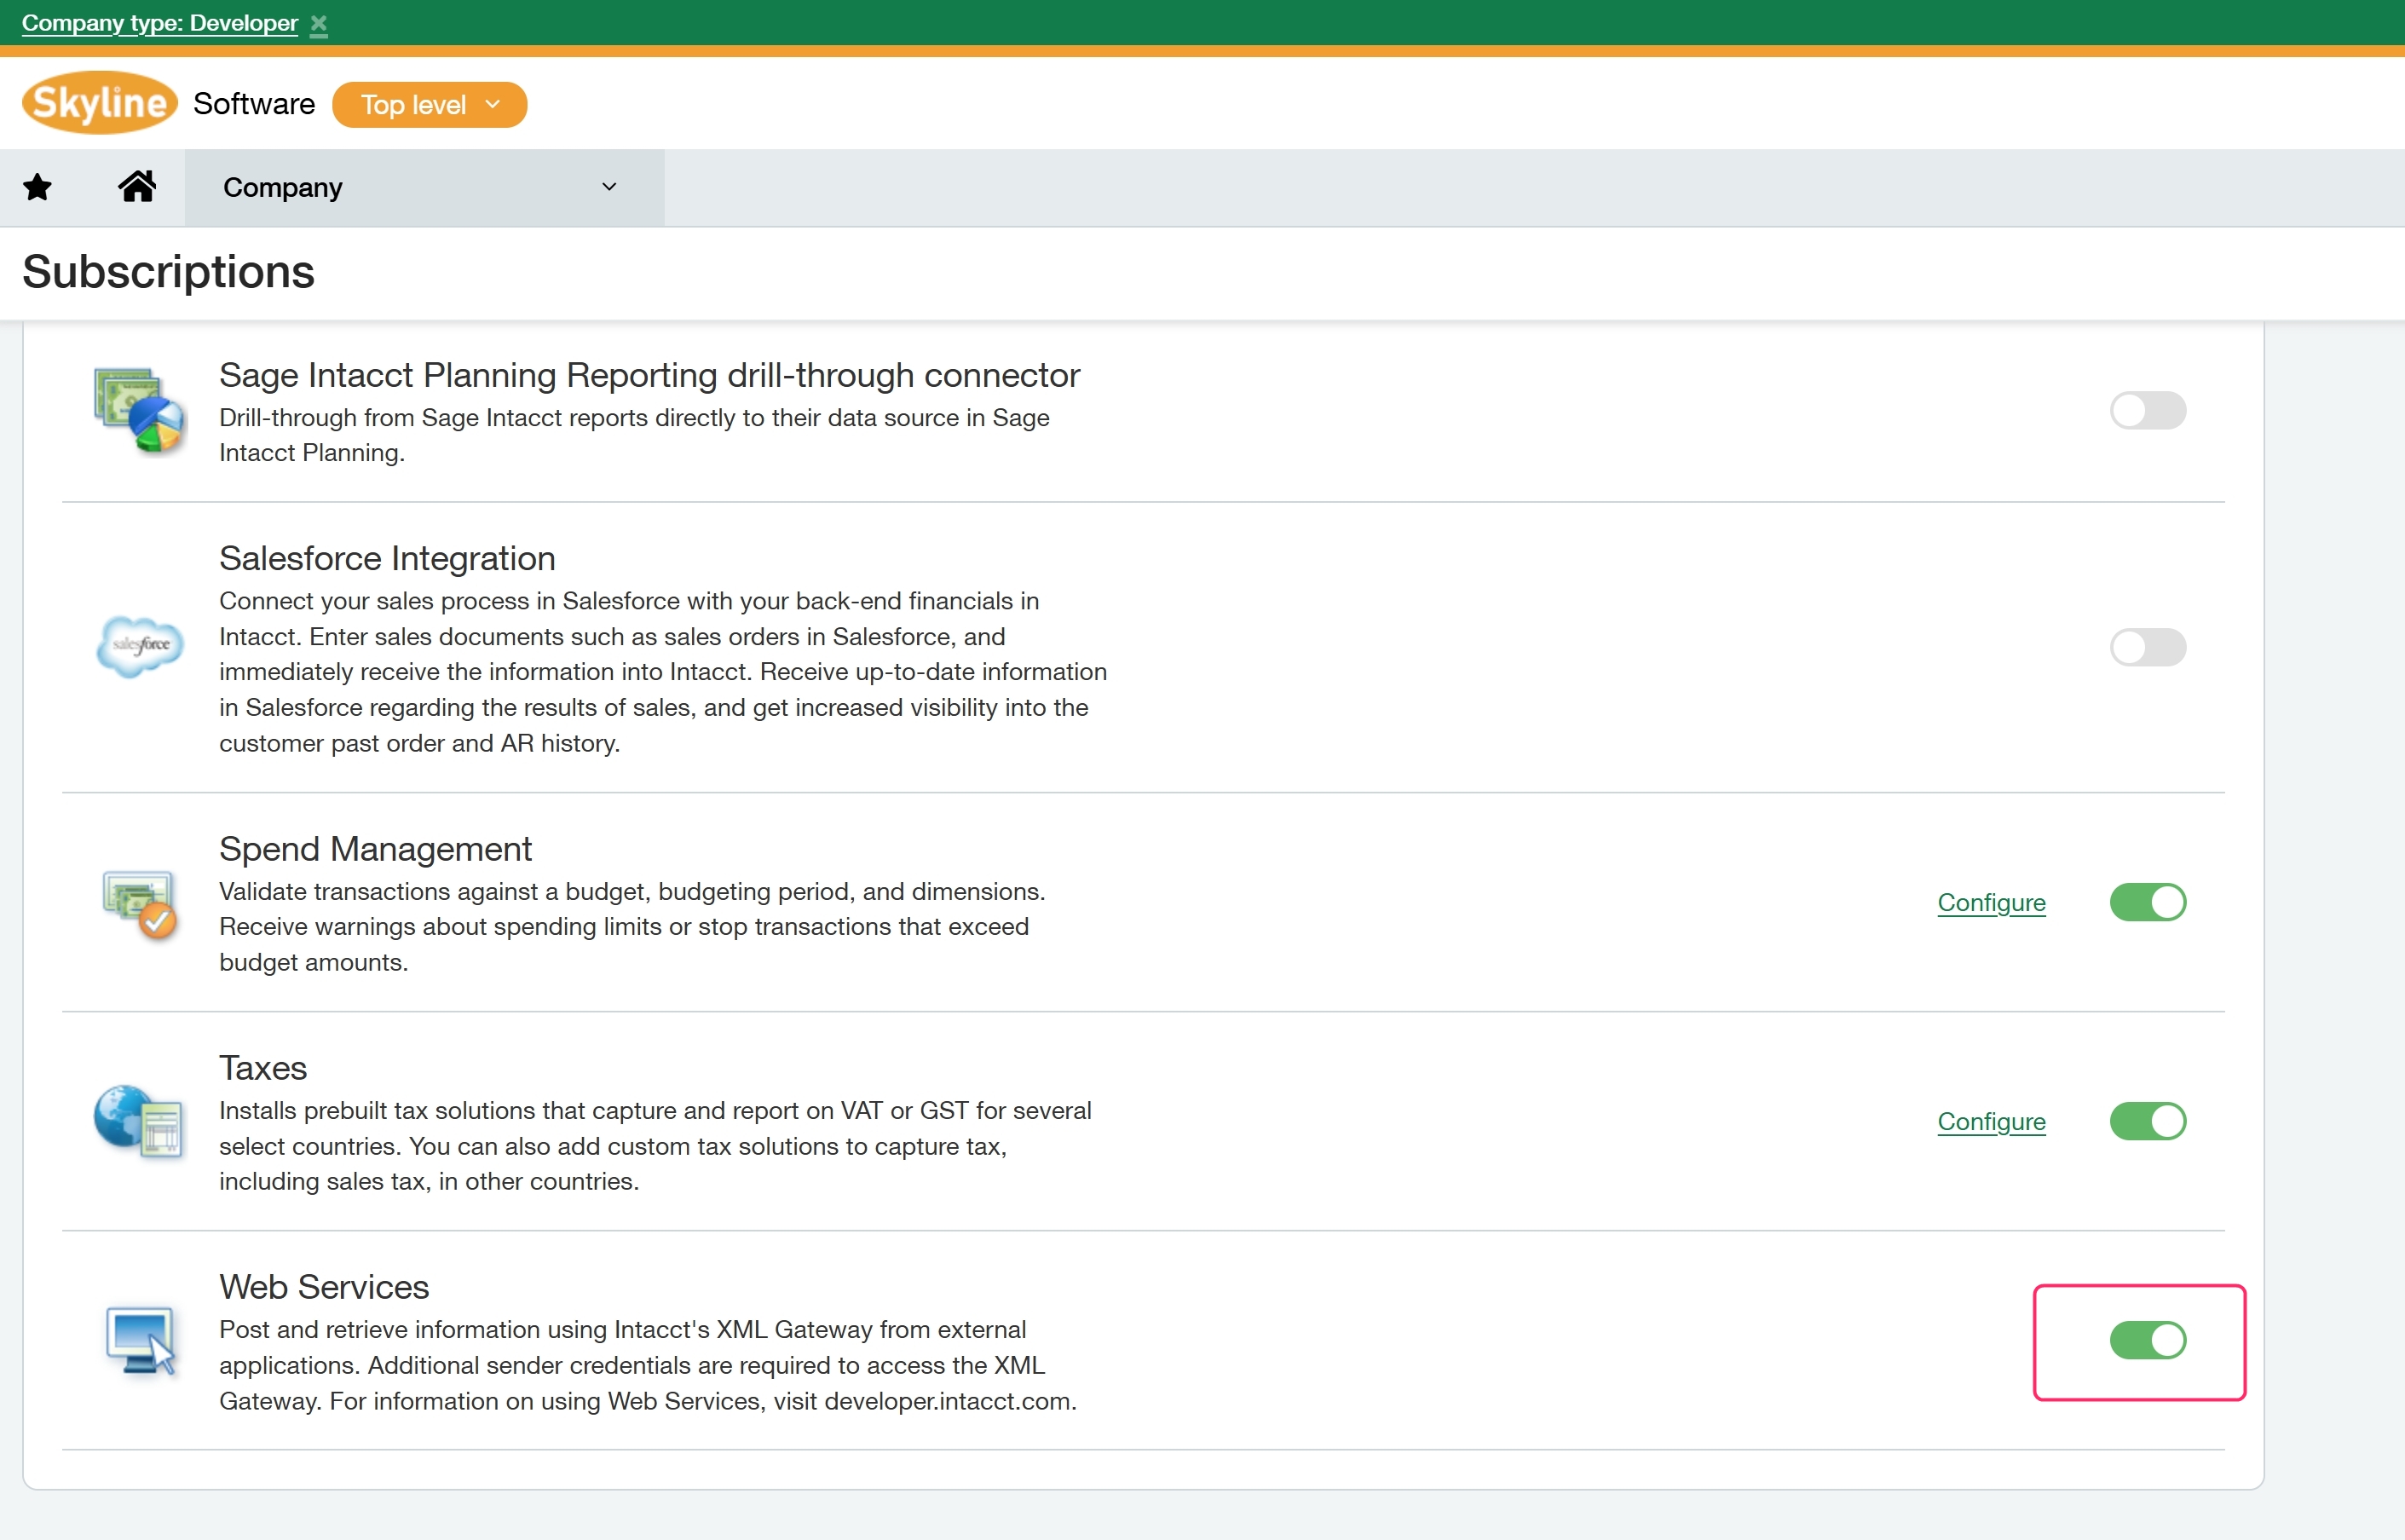
Scroll down to find Web Services and turn this setting on.
Find your Company ID
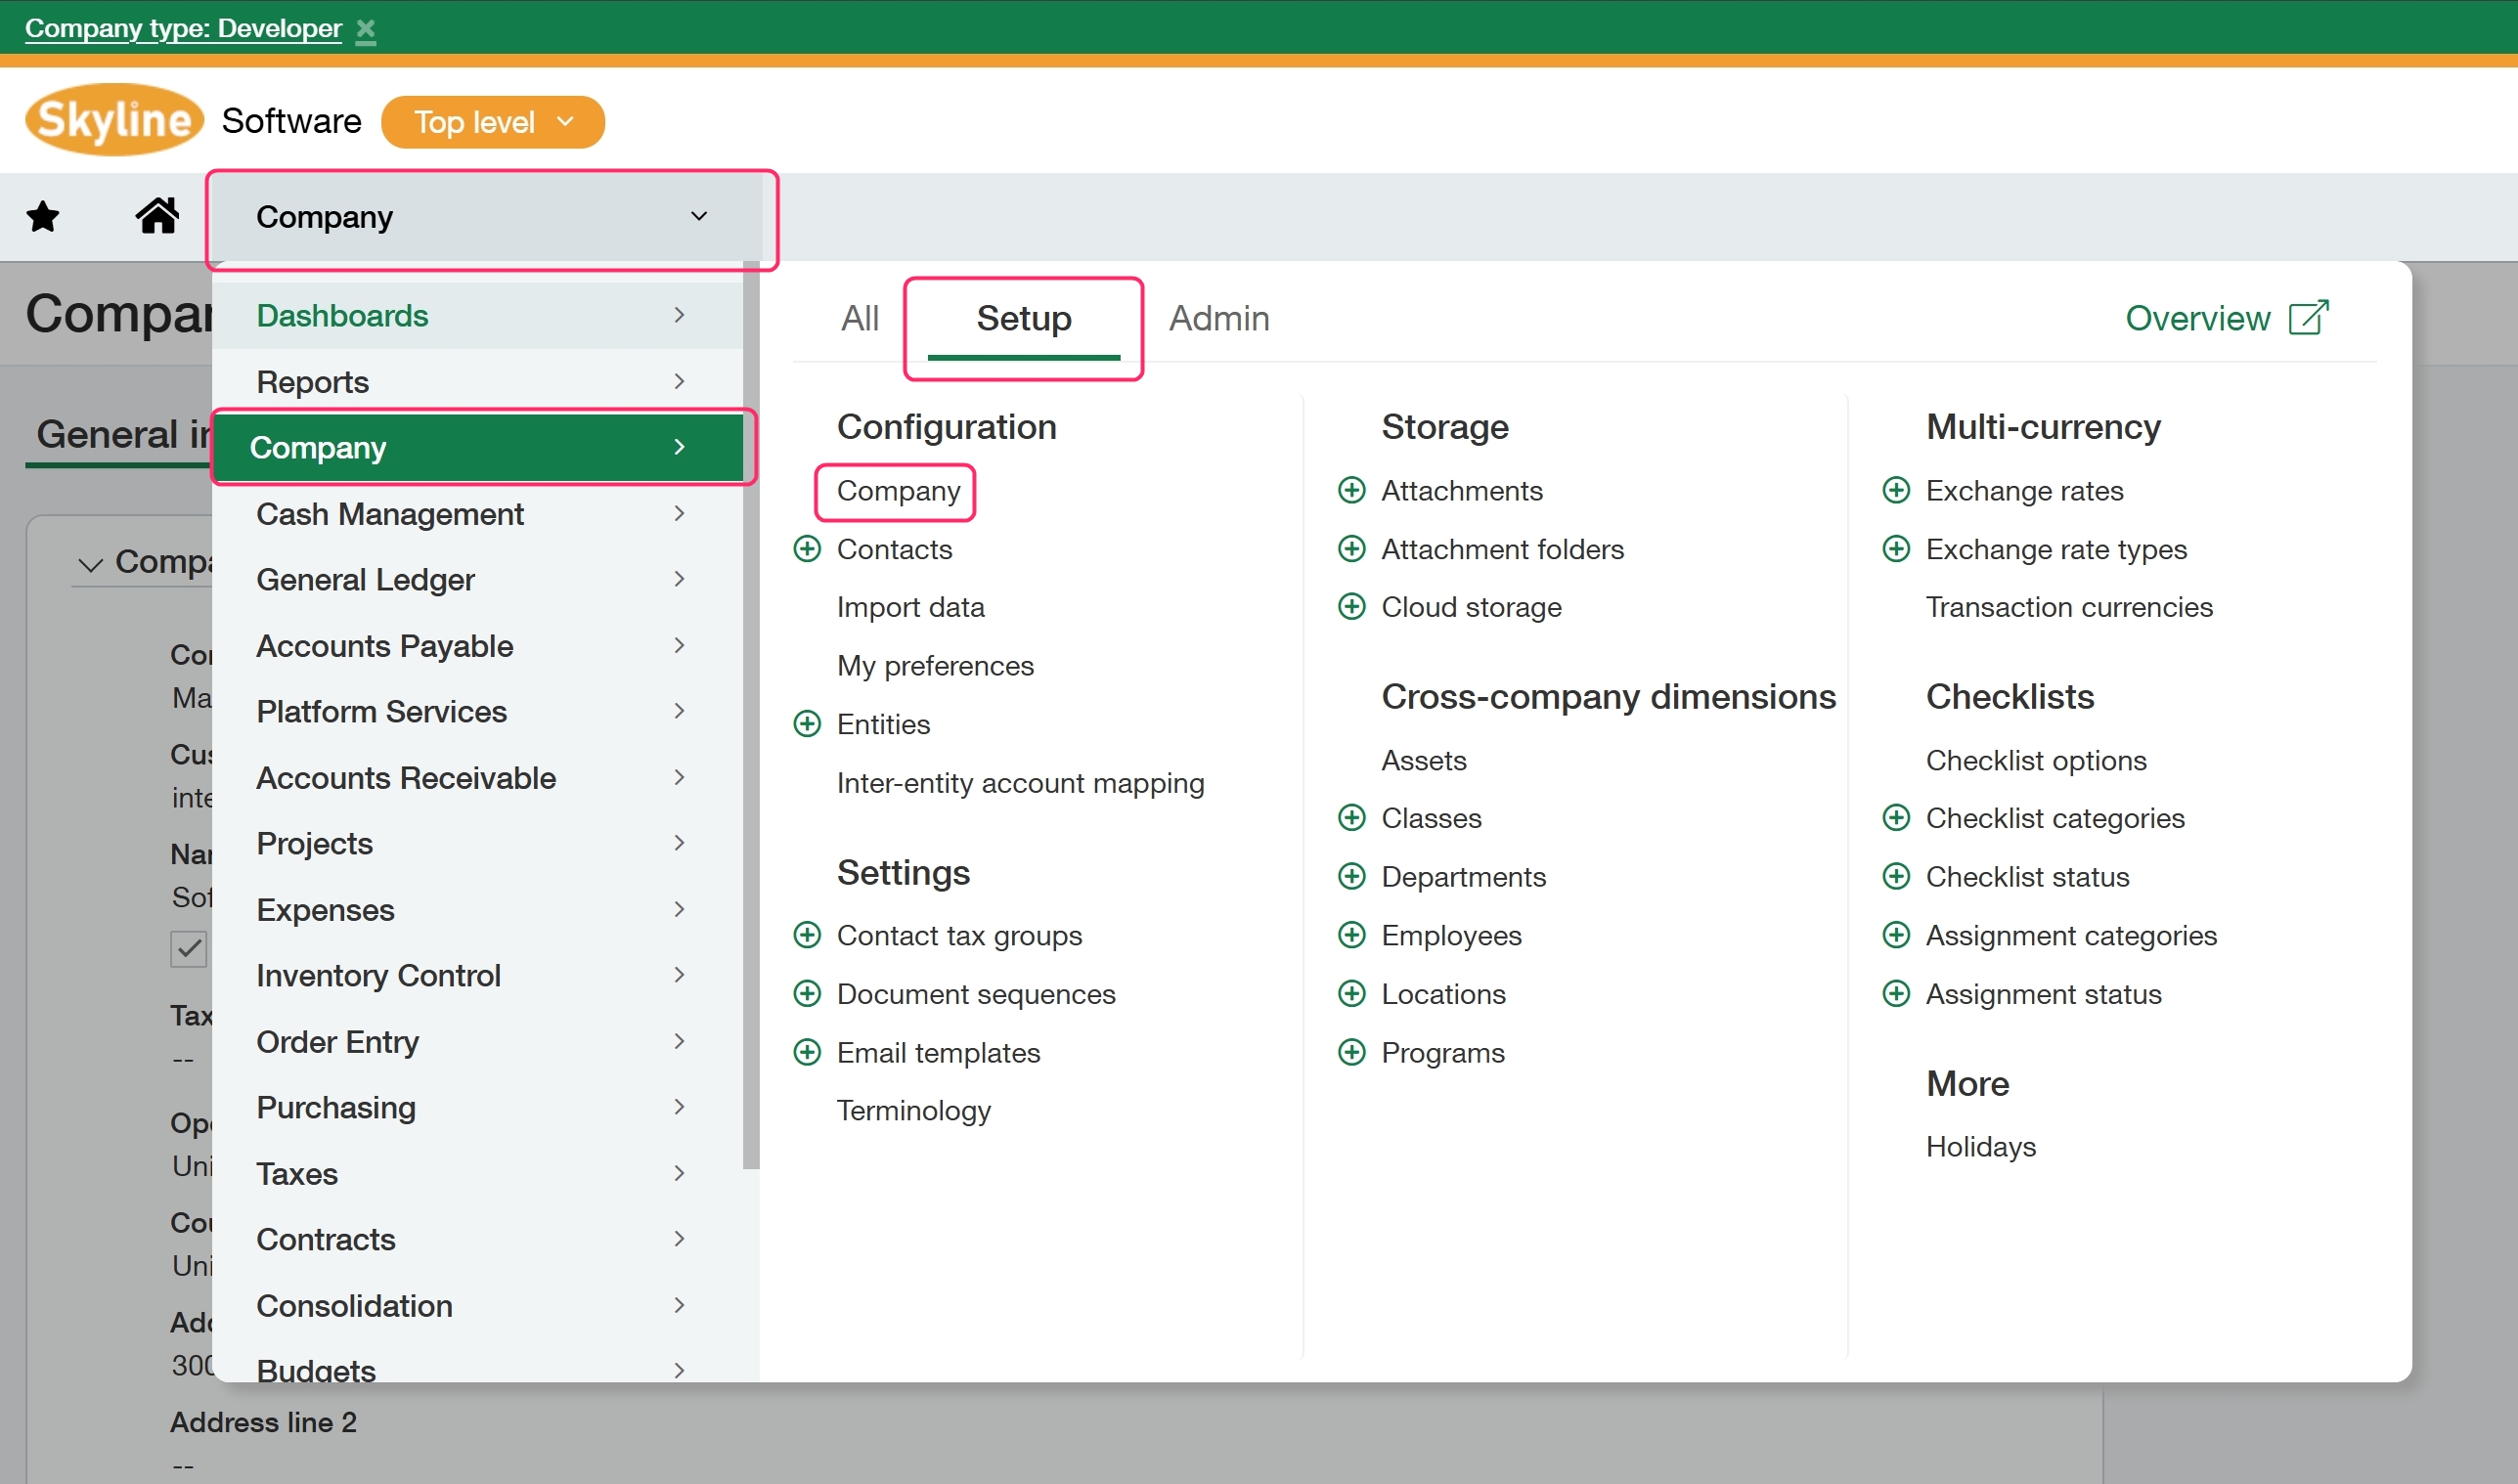
Go to the Navigation menu > Company > Setup > Company.
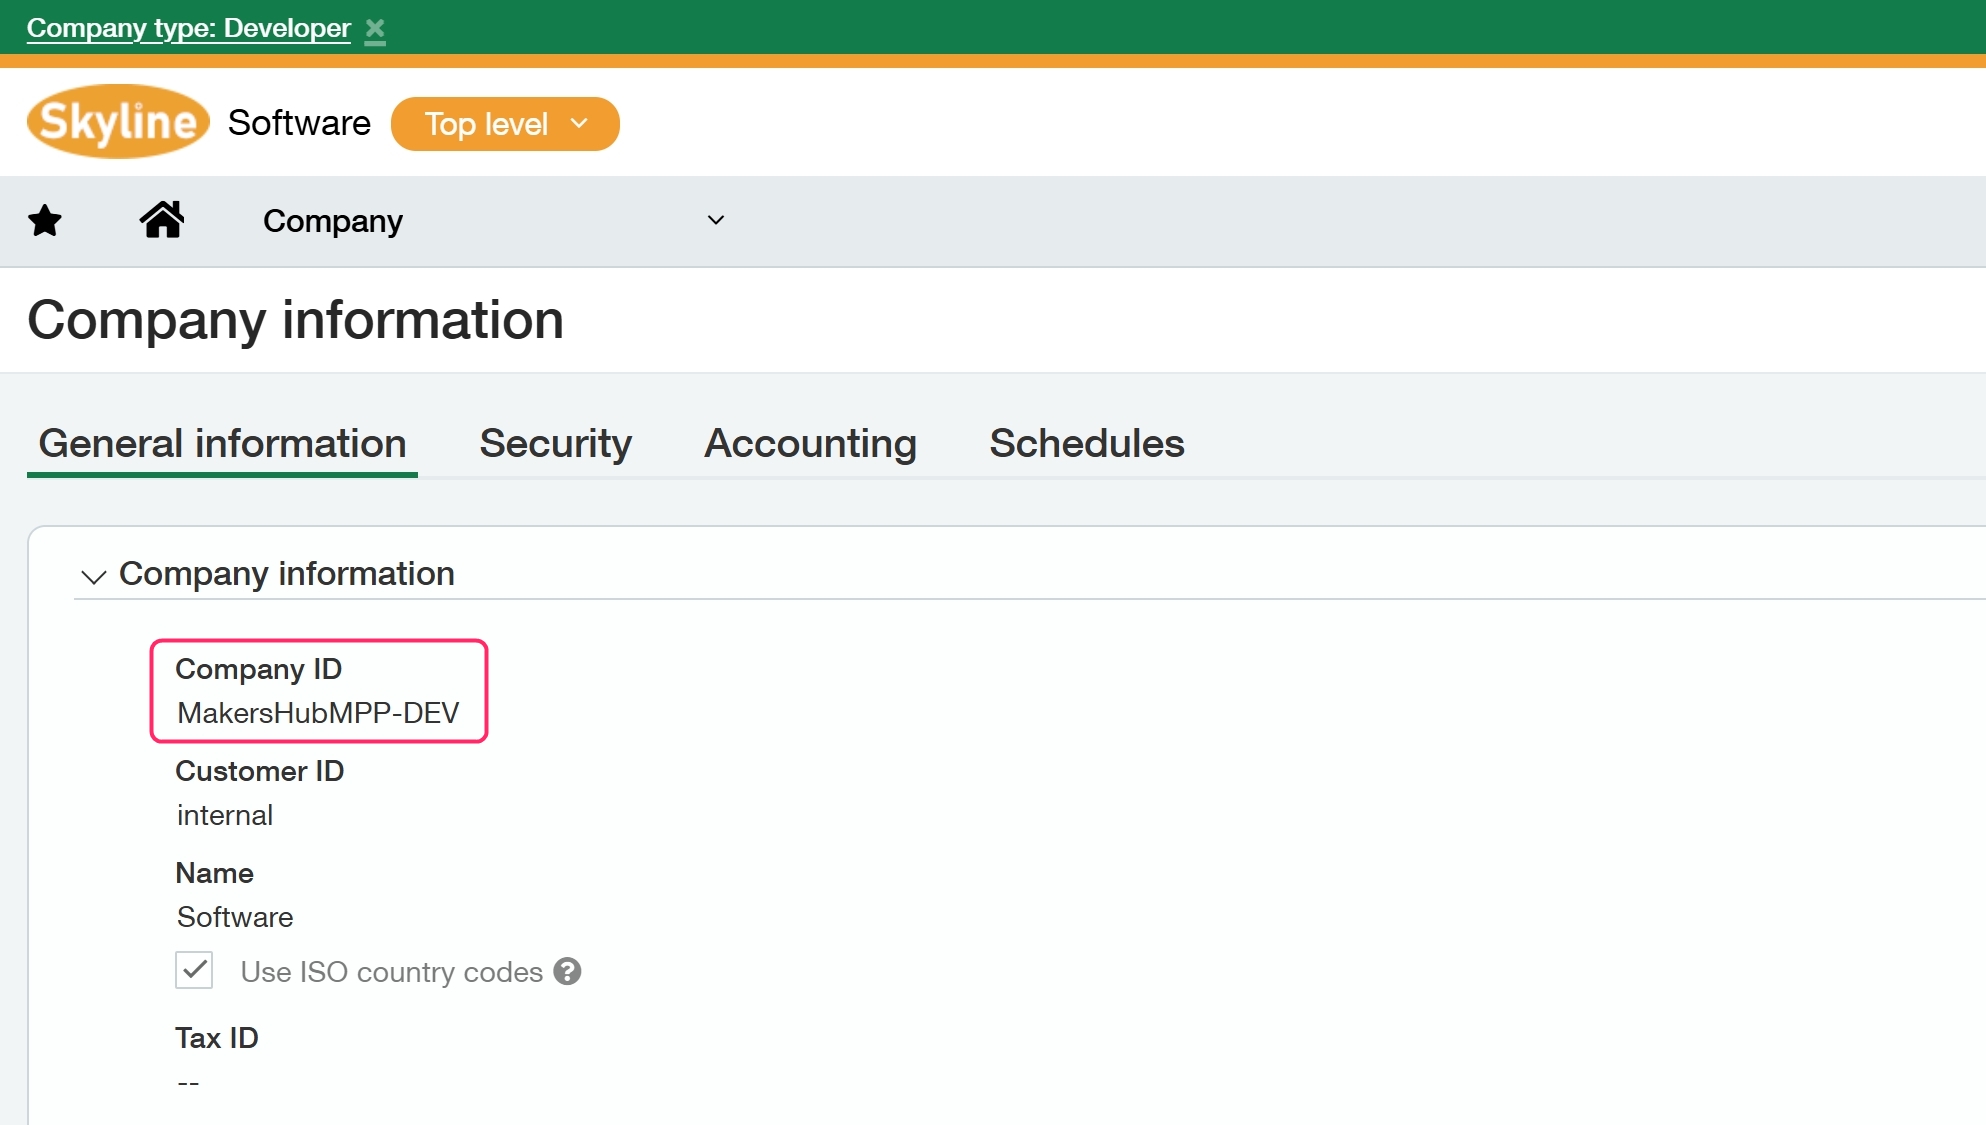
Copy down your company ID as we will need it later for the MakersHub connection
Create Web Service Token
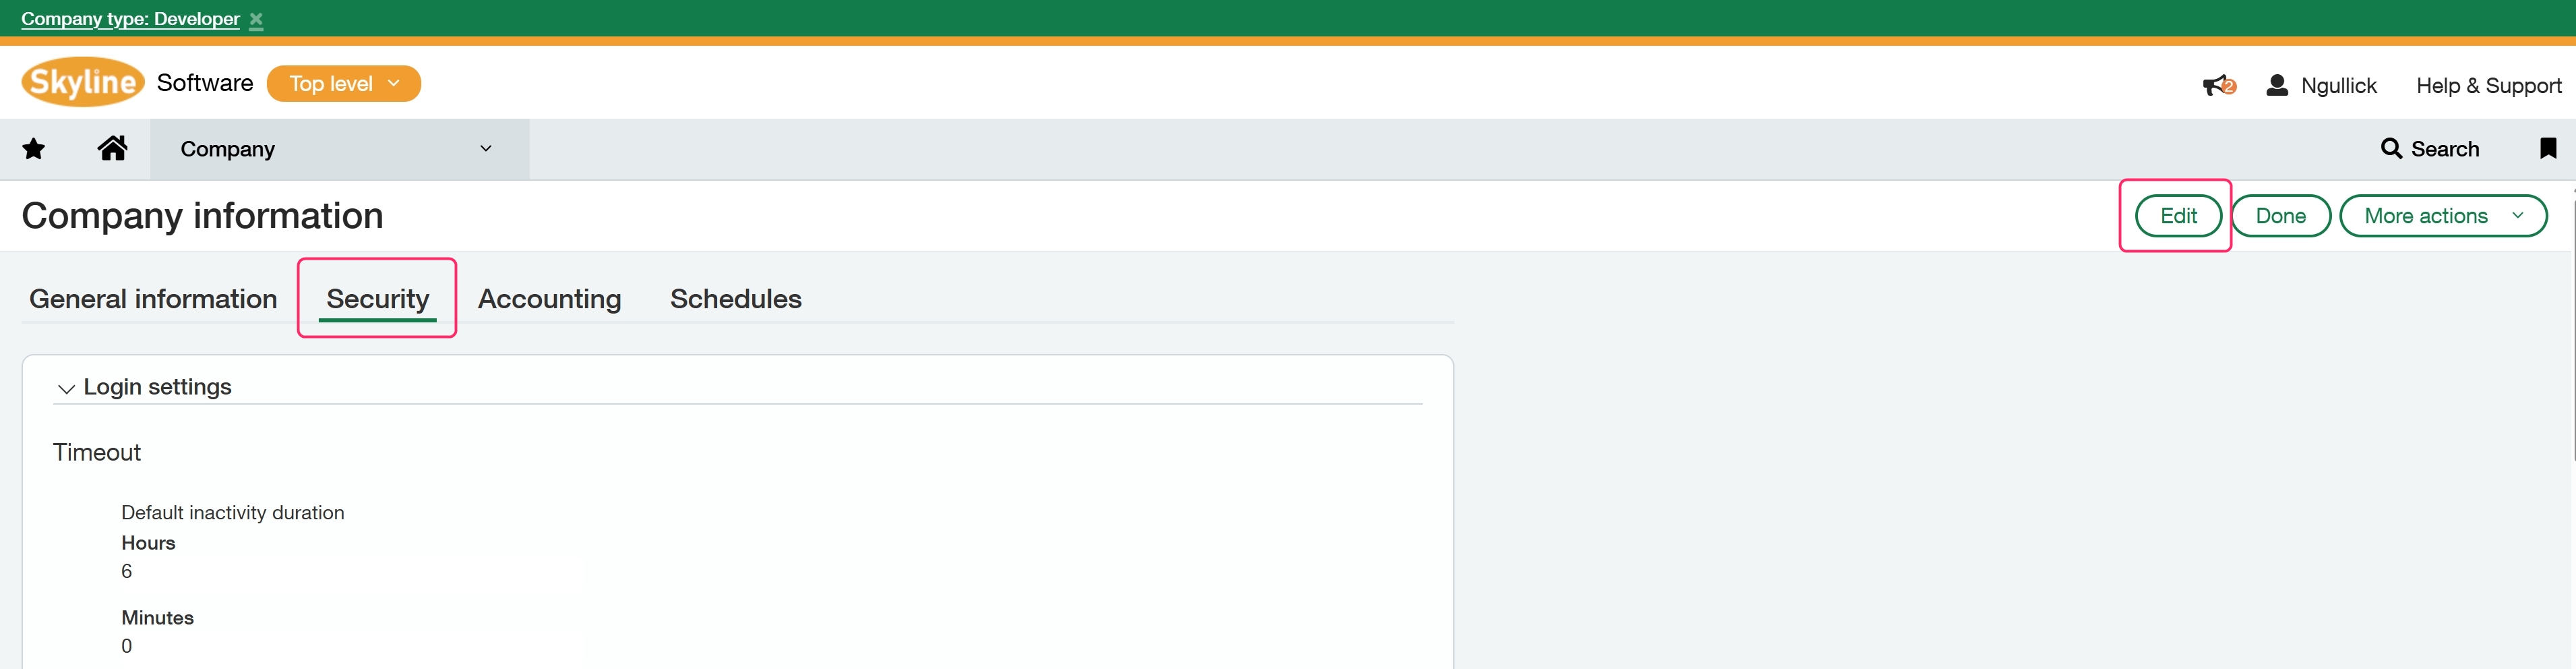
Go to the Navigation menu > Company > Setup > Company.
.png)
Go to Security section and click edit.
Scroll down to the section Web Services Authorizations and click Add.

Fill in the Sender ID with MakersHubMPP, add an optional description, set status to active, and save.

Create User Permissions
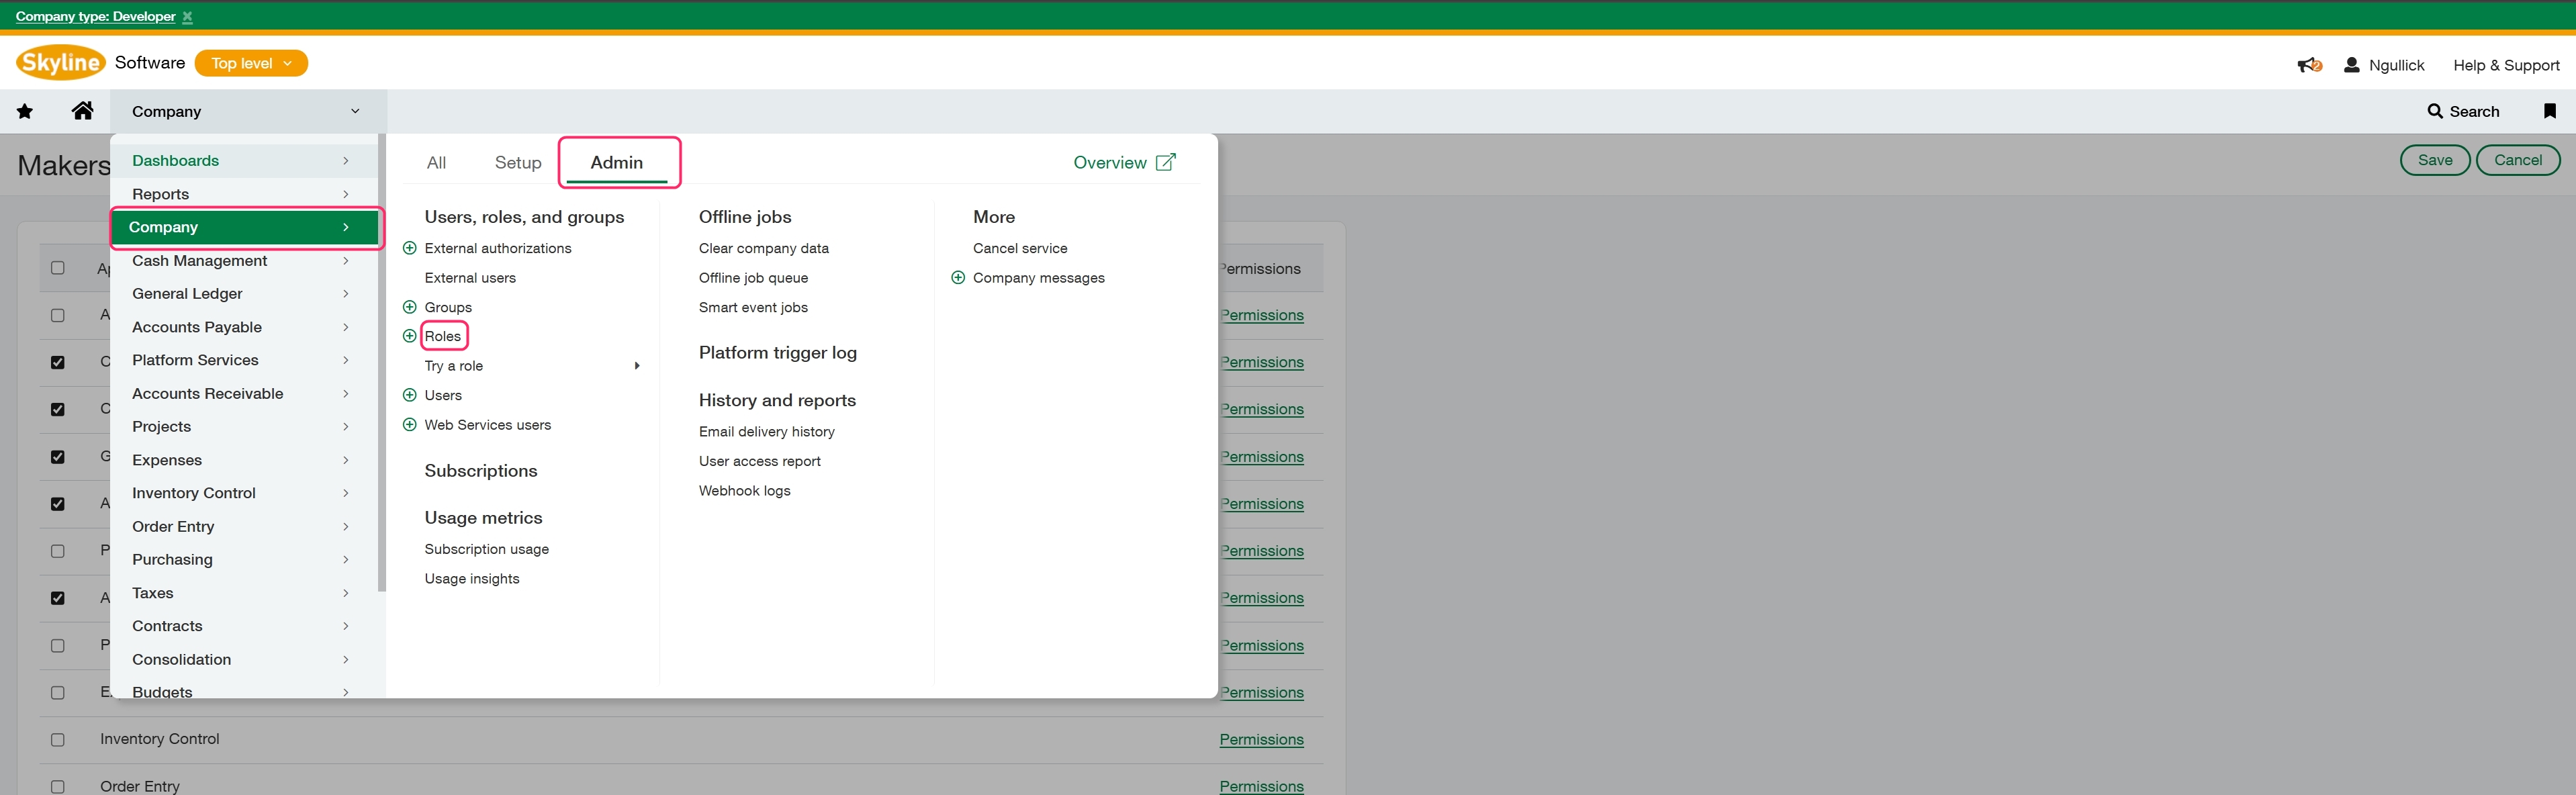
For the next step we will need to create a role to assign to the integration user. Go to Company > Admin > Roles.
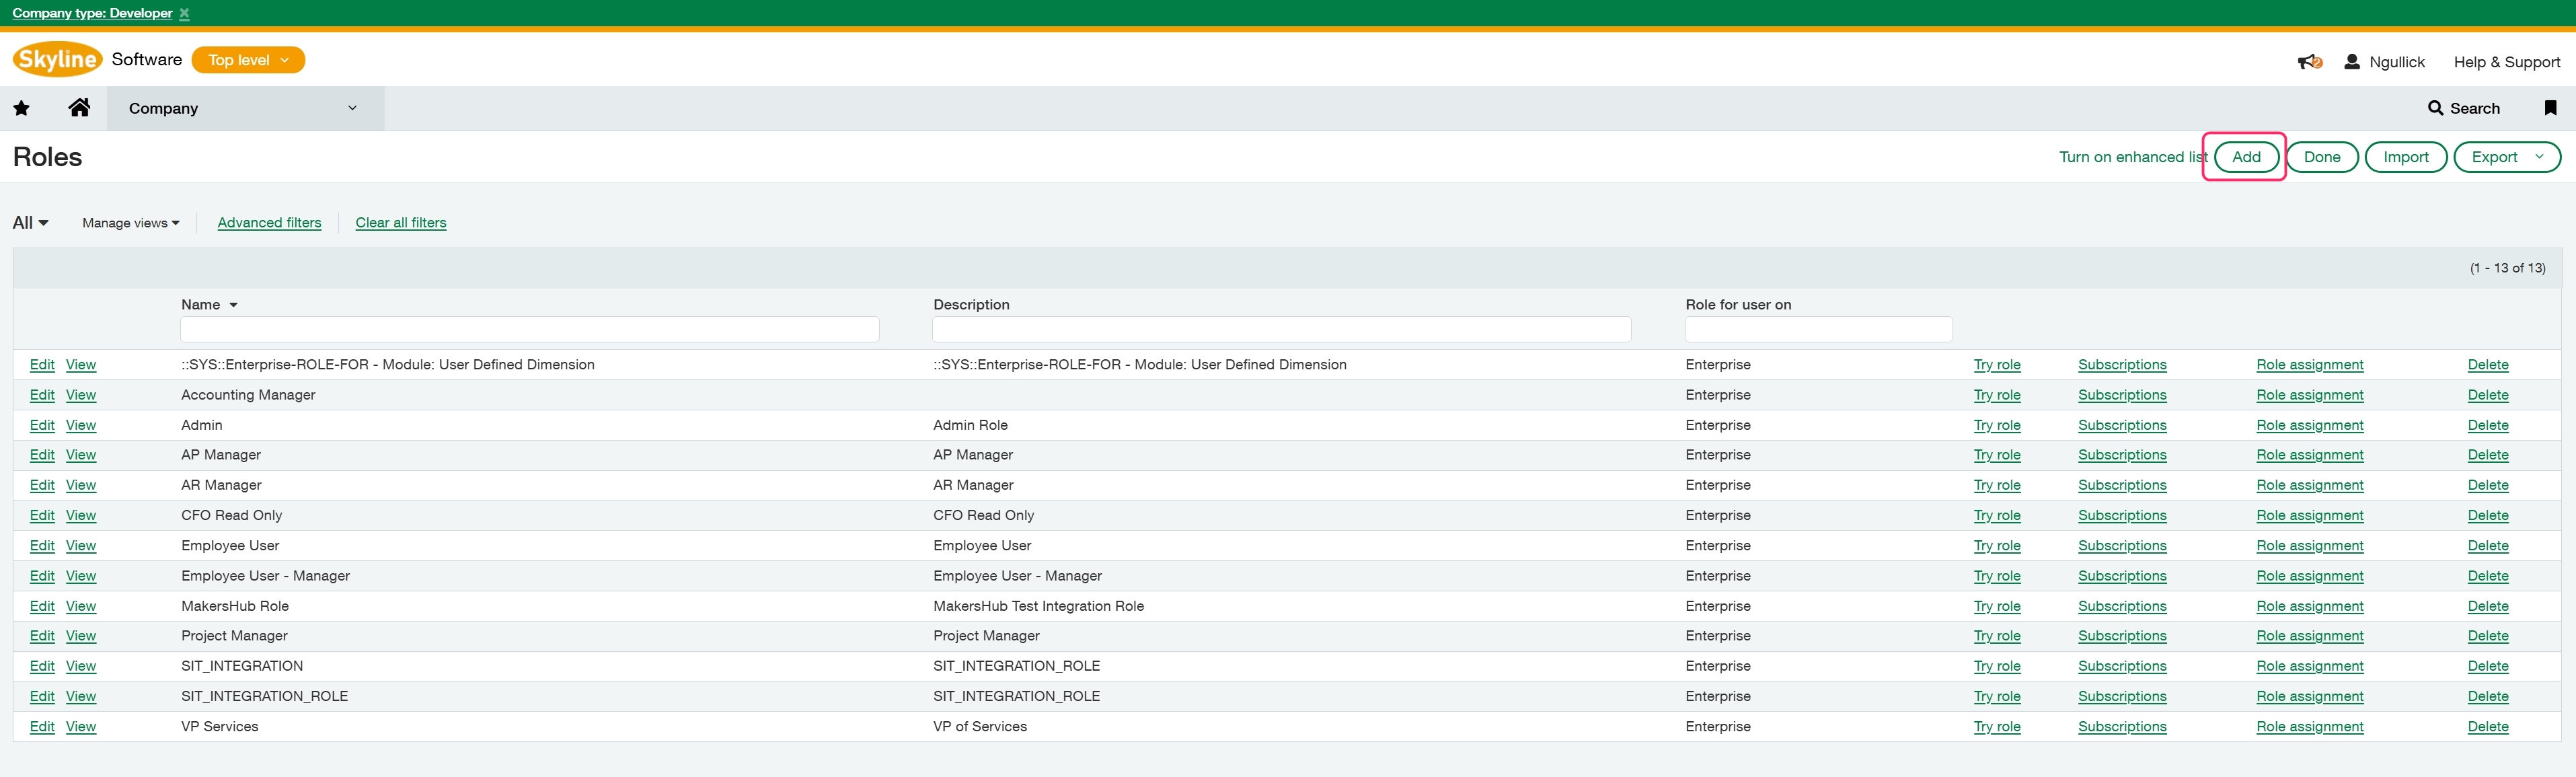
Select Add in the upper right and add a Name and optional description for the role, such as “MakersHub Integration Role”, and click Save.
Click on Permissions next to the specified area to pull up the list of editable permissions. Once you select the permissions click save in the upper right. Permissions are listed below, please note that permissions will include all lower permissions. Example: Edit includes list/view as permissions. For the screenshots of each permission please see the following article: Sage: In Depth Permission Settings
Company | Level (Includes all lower permissions) |
Departments | View |
Entities | View |
Cash Management | |
Credit Card Accounts | View |
Checking Accounts | View |
Saving Accounts | View |
General Ledger | |
Accounts | View |
Account Title by Entity | View |
Accounts Payable | |
Manual Payment | |
Vendors | Edit |
Bills | Edit |
AP Terms | View |
Posted Payments | View |
Check Run | Edit |
Purchasing | |
Vendors | Edit |
Items | Edit |
Purchasing Transactions | Edit |
Once you have selected all of the permissions click save in the upper right.
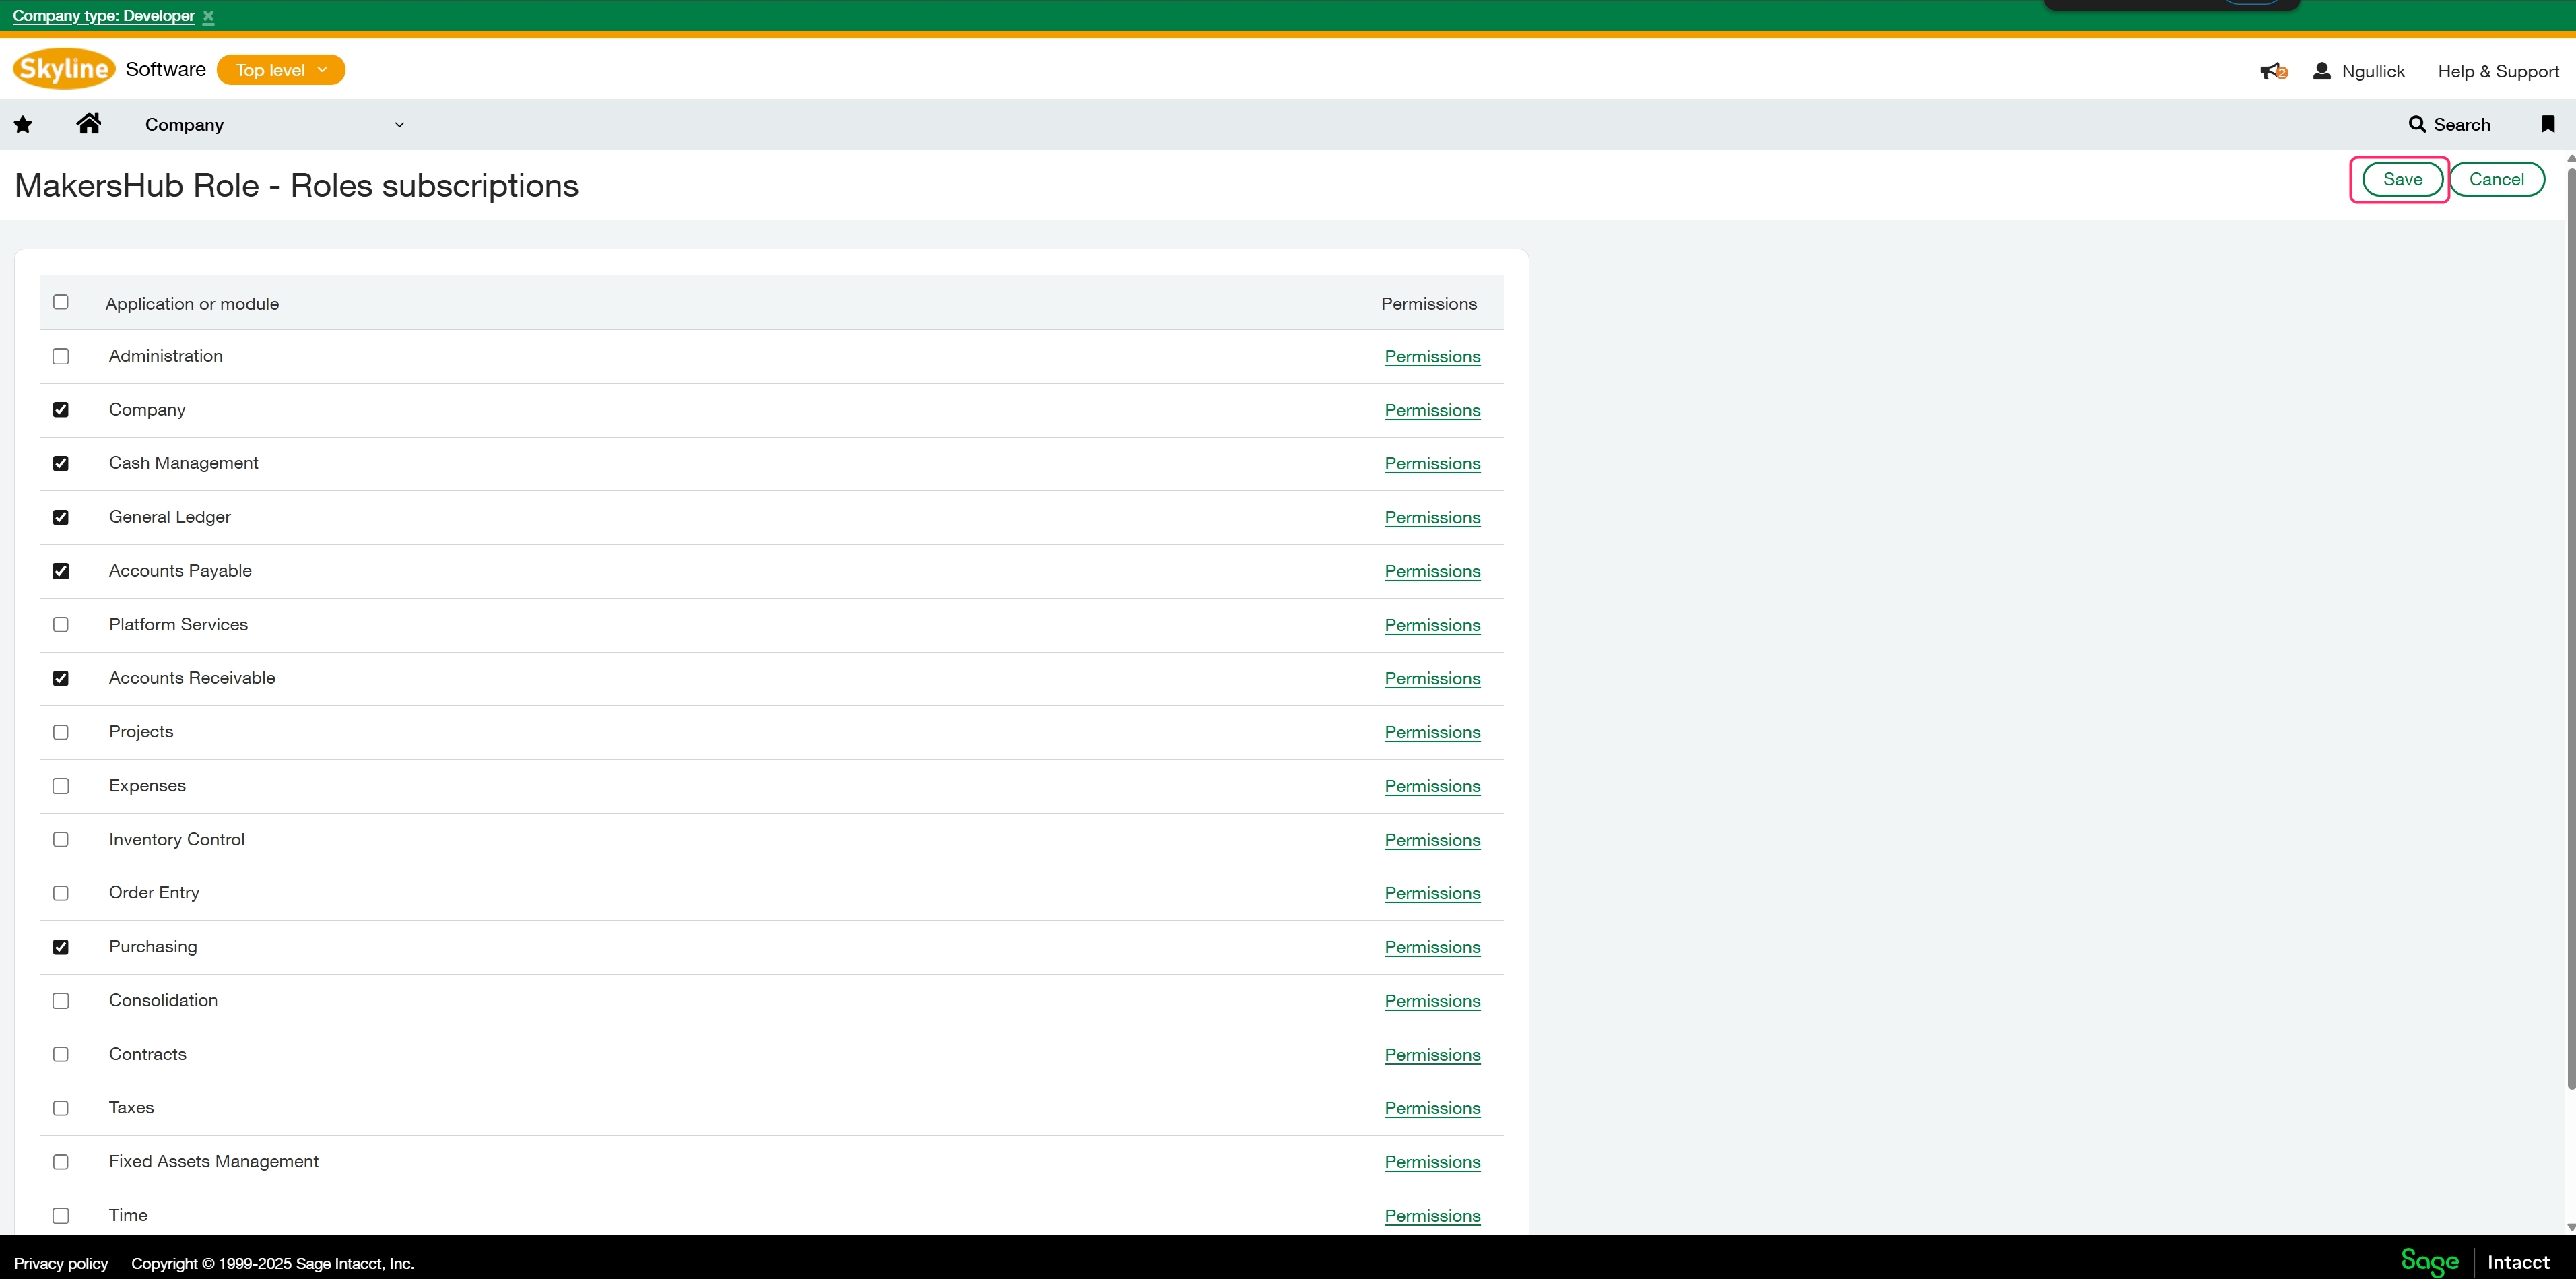
Permissions
If you are experiencing issues with the newly created role you can assign the administrator role to the integration user that will resolve any permission issues.
Create Integration User
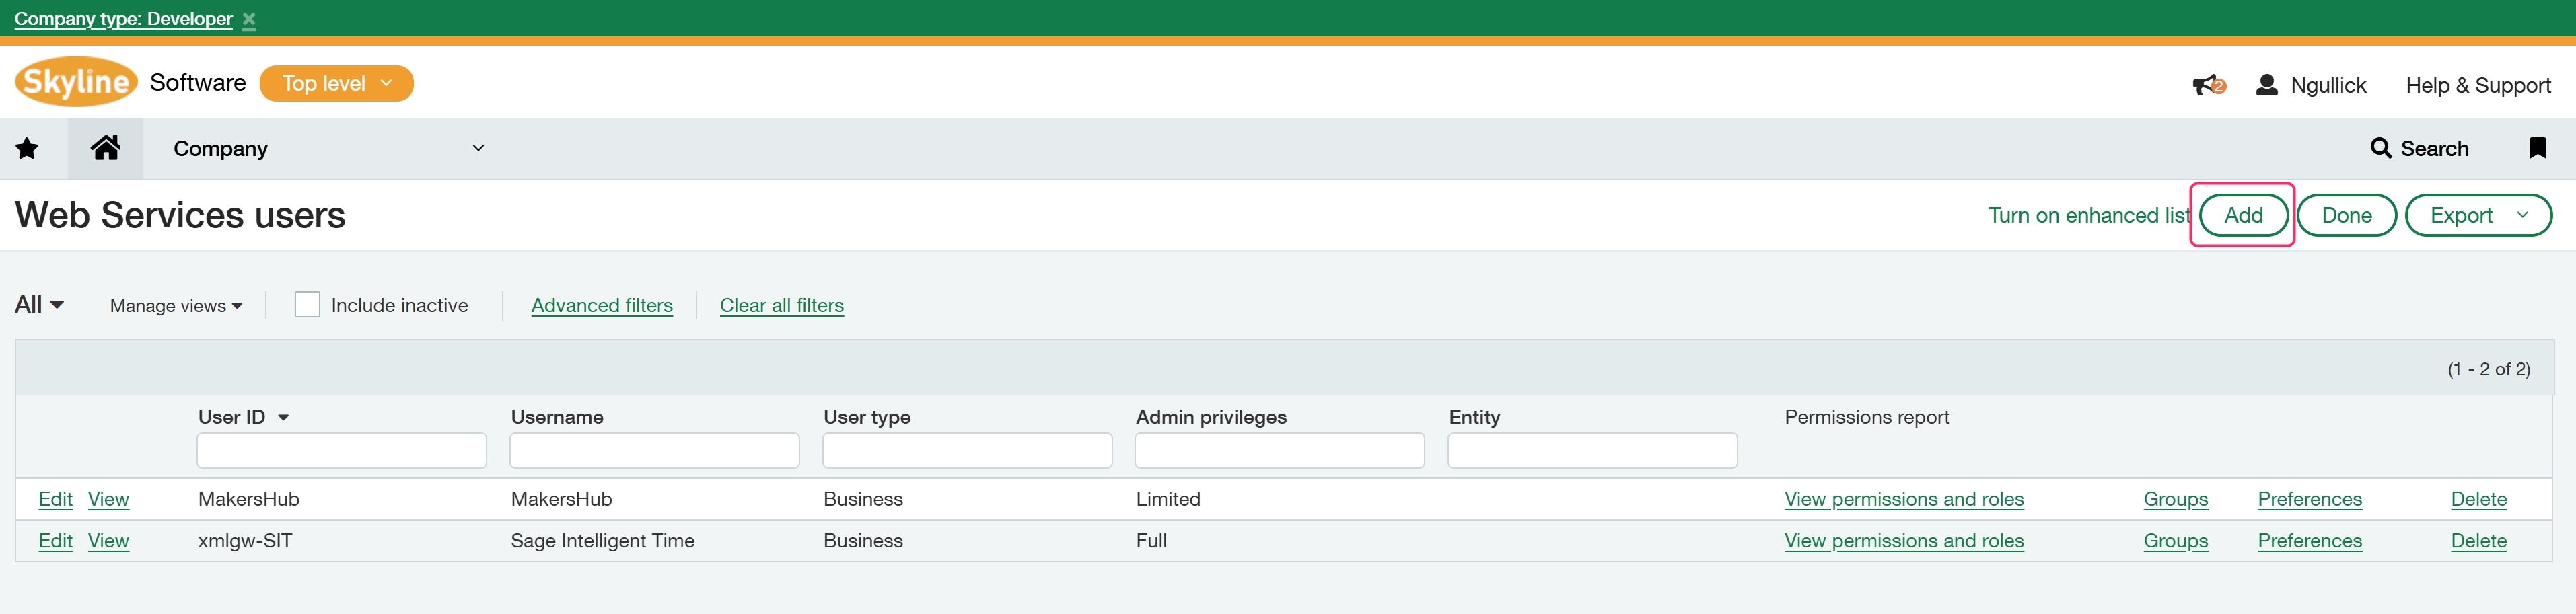
Go to the Navigation menu > Admin > Web Services User.

Click add in the upper right corner.
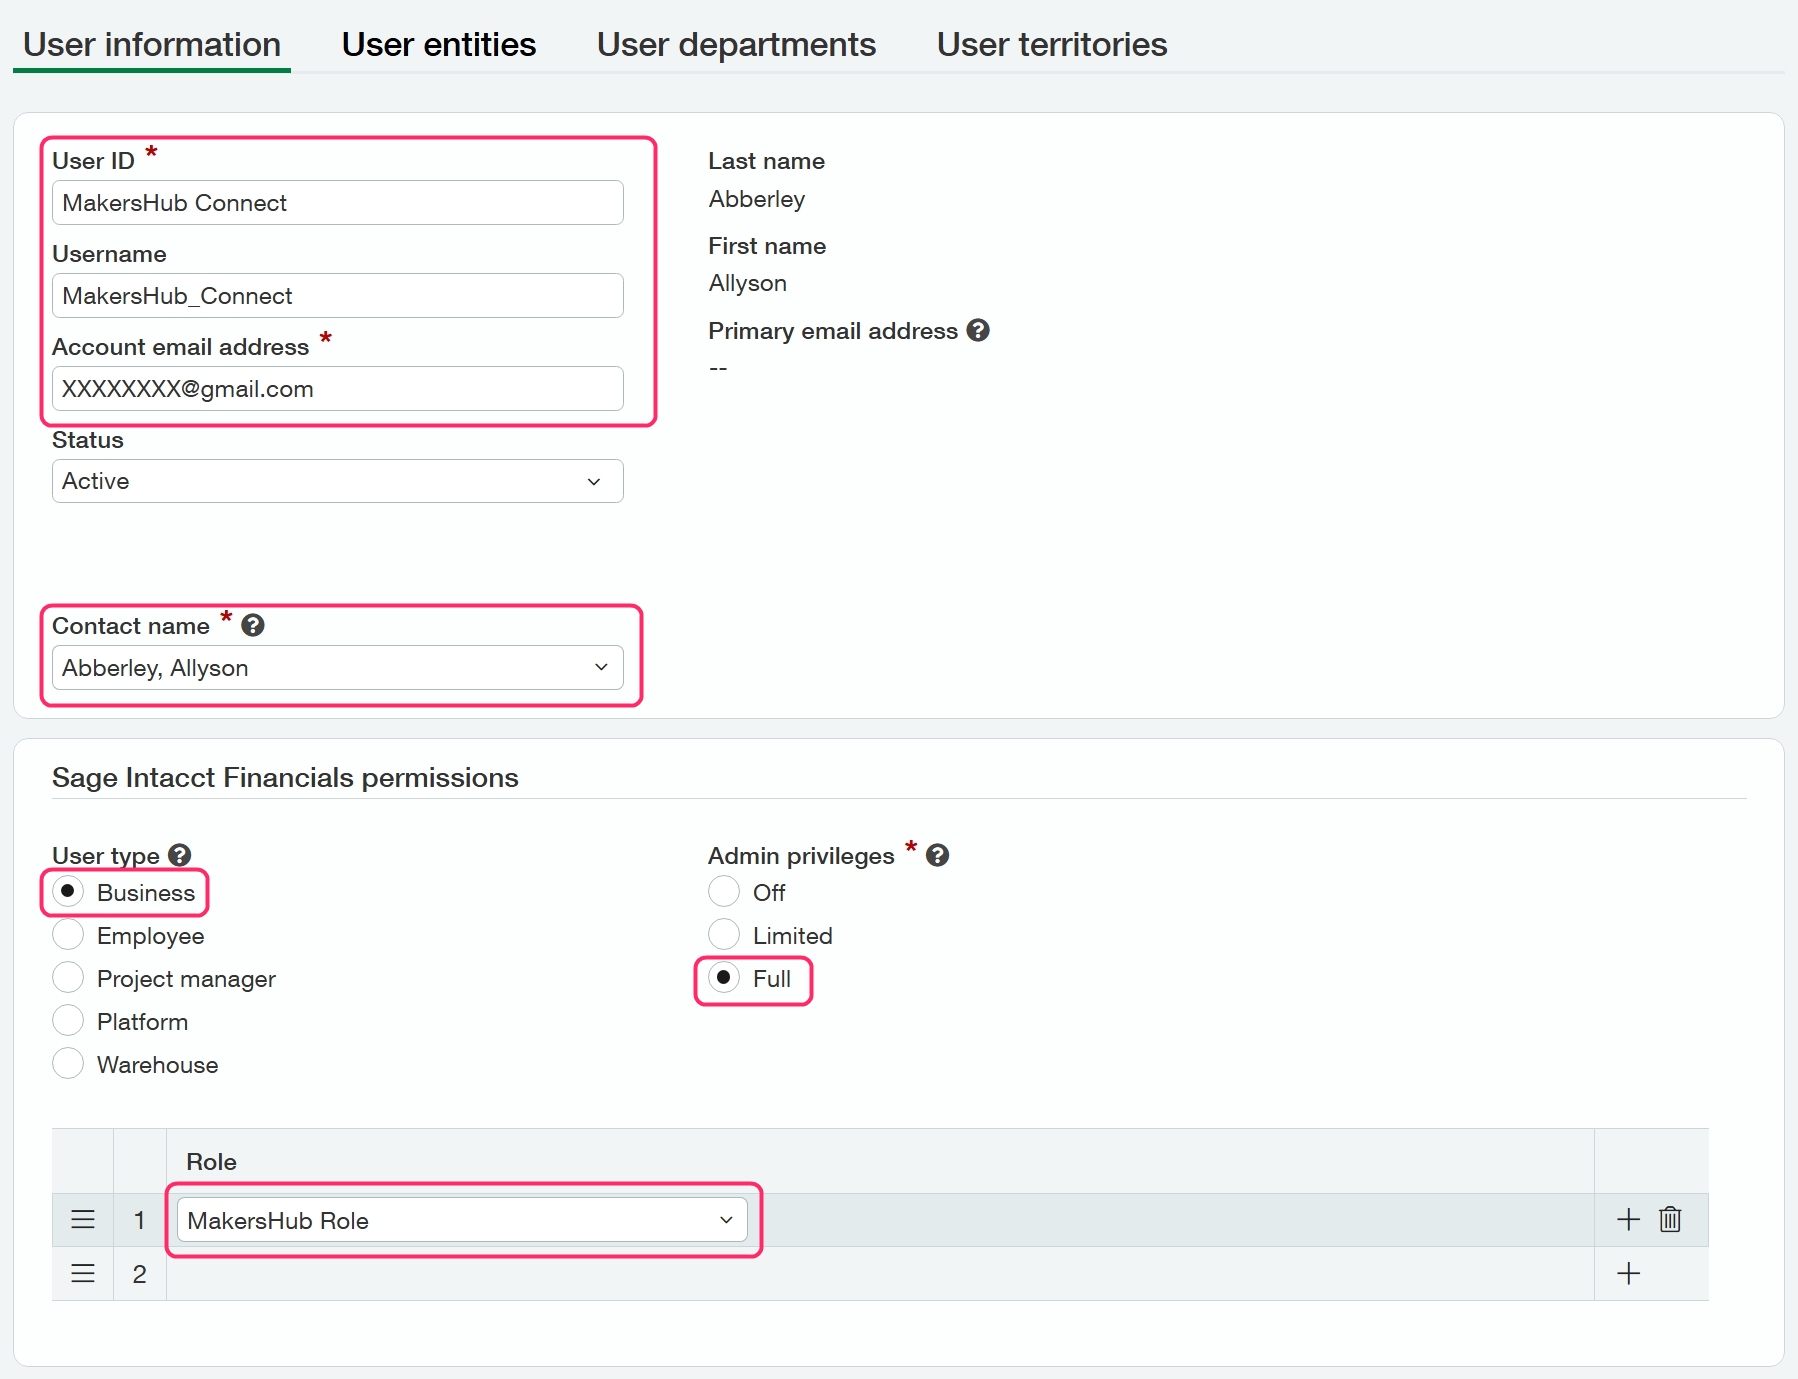
Fill in the information for User ID, Username, Account email (a password will be sent to this email address that is needed to setup the MakersHub Connection.), Contact Name, Set User type to business, Set Admin Privileges to full, and set the Role to the “MakersHub Integration Role” created in previous step.
Contact Name
You can use an already created contact or create a new contact. Please see below excerpt from Sage on the function of this field.
Contact names can be simply informational. Or, they can be added to the company to enable the following functionality:
Event information is sent to the correct individuals. For example, you could create a contact for a vendor or customer so that the right person in the company receives bills or invoices, and notifications as needed.
Access to the company. For example, you can associate an employee contact with a user ID to enable an employee to enter timesheets and expenses. Similarly, you can associate a customer contact with a user ID to enable a customer to log in and approve timesheets or expense payments. Additionally, some vendors might be subcontractors who need to log in to enter timesheets and expenses.
Setup in MakersHub
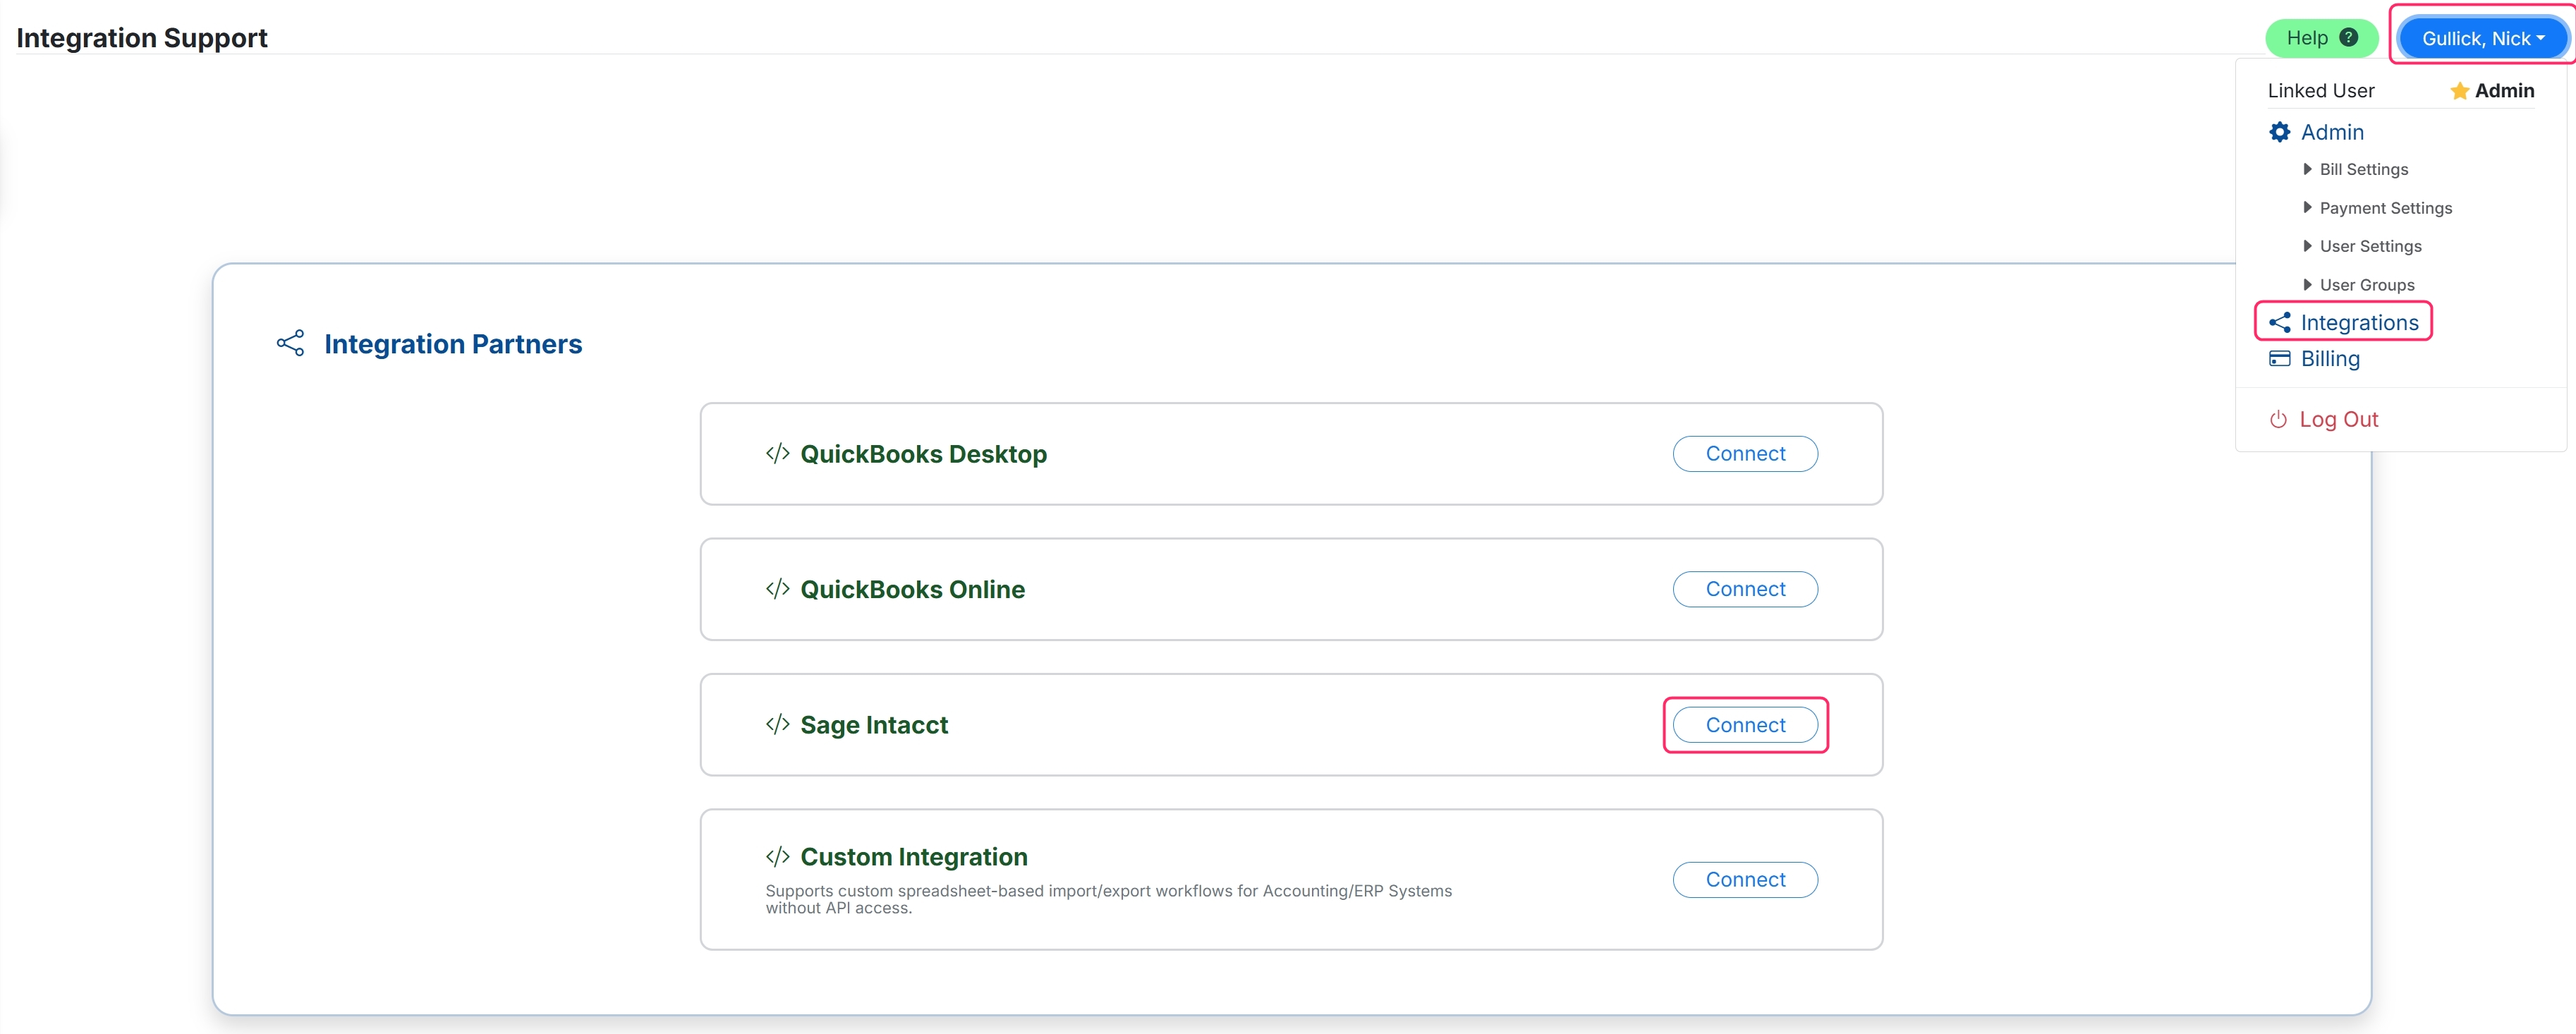
Go to your name in the upper right > Integration > Connect next to Sage Intacct > and then click create sage intacct connection
Enter your company ID, User ID, User password (The password that was sent to your email), and then click Update.

Click Test connection.
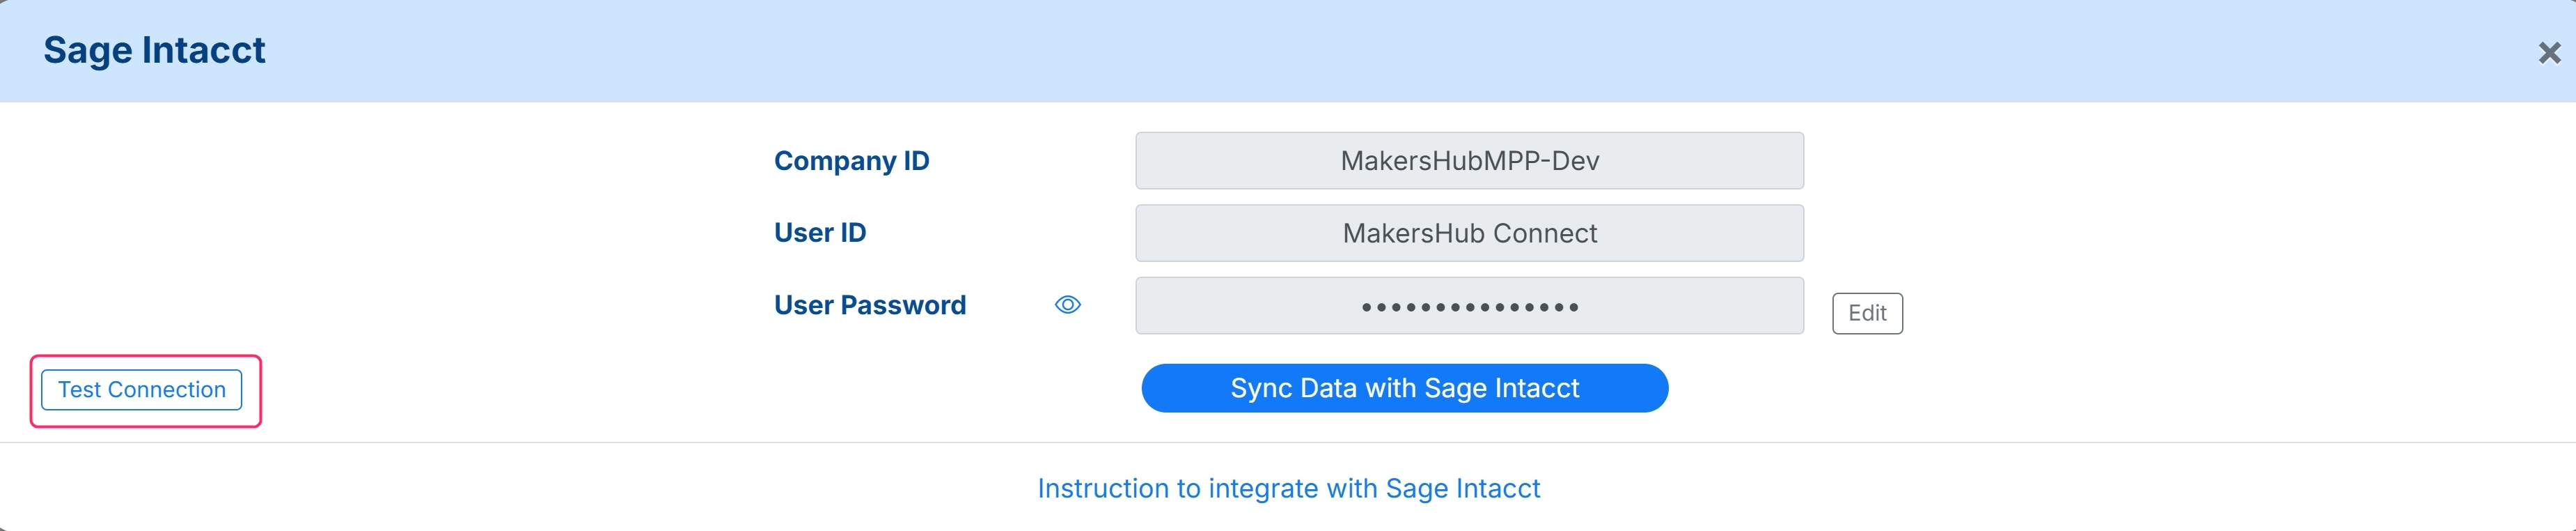
Once the test connection is successful click the Sync Data with Sage Intacct.

Congratulations you have successfully connected MakersHub and Sage Intacct. You can check your list of records that MakersHub brought over by going to the Integration Data Tab.
.png)